Finally I need to compare the two versions paying particular attention to dynamic range, white balance and colour and local adjustment of any kind.
Do I notice any differences between the raw and jpeg?
High Dynamic Range RAW
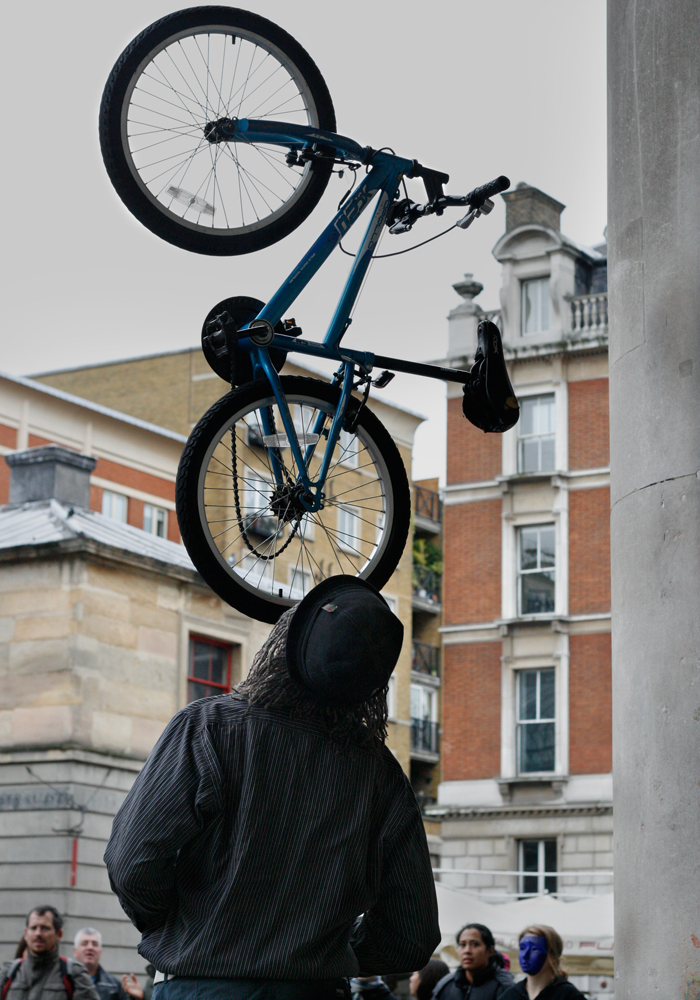
This image was taken in Covent Garden of a street performer "juggling" a bike. The bright sky, stalls and white brickwork and his dark shirt has provided the high contrast needed to experiment with recovering any details.

This is the RAW image before any conversion has taken place. The histogram shows the values stretching across the axis. As it was a very grey day with low light I shot using ISO 800, any increase in exposure in post production would run the risk of introducing digital noise, especially in the darker areas.


High Dynamic Range Jpeg


The adjusted histogram once more shows that there are no longer intense whites or blacks. On face value there does not appear to be that much difference in the end result. I found fine tuning in RAW easier as there are more tools available, even though I need to master the adjustment brush a little more. Some of the adjustments are also more subtle and easier to control in RAW. Having said that I do like the flexibility that adjustment layers provide and in reality would possibly combine various techniques to achieve the final result.
This is a comparison of a selected area of both final images. The jpeg is on the left. Where I had altered the blacks in RAW the hat looks a little more blue which in fact it should not something to pay attention to in future, but the main comparison was for coloured artifacts. They are more visible in the jpeg image but I had to increase the magnification to 600% to really see it. You can see the difference more on my screen than you can in the uploaded jpegs, although the effects can be seen in both the hat and the shade in the balcony.

Daylight Raw
 This was also taken in Convent Garden of a bystander watching the juggler. The image appears a little "cold" and was slightly over-exposed on the man's fingers and nose, with a minimal amount of highlight clipping.
 After adjusting the exposure, temperature, tint and vibrance the image is correctly exposed and is much warmer. Possibly now uploaded the columns have a richer hue than in reality but I quite like the effect.
Daylight Jpeg
 The final adjusted jpeg is also correctly exposed and has a warmer feel, I found some of the adjustments too over powering, channel mixer can be used to correct cast as can photo filter. In this instance I used a curves layer and hue and saturation. This image looks too pink but if I continued to experiment I possibly could have achieved a better result.
Artificial light RAW
For the third required shot, artificial light, I decided to choose an image not only shot in artificial light but which also had quite low lighting as the other two images I had were taken in fairly bright daylight. I wanted to compare how different RAW and JPEG processing would be in lower light conditions.
Once more I could see that the colour cast was more overpowering in the jpeg than the raw before any processing took place; even though I had set the WB to tungsten there was a distinct yellow cast.
 |
| RAW original |
Several adjustments were made in ACR, exposure was increased slightly, a custom white balance was applied, temperature 2650 to obtain the correct colour of the Christmas decoration, slight sharpening and as there was a hint of lens flare from a Christmas tree light the clone tool was used to remove this and a distracting glint in the top lefthand corner. A tones curve was used to alter some of the shadows. Finally local adjustments were made with the exposure brush to the blue bauble in the background.
 |
| Using the Clone Tool |
Using some of the tools at the moment is quite tricky. Having never used the clone tool before it took me a few attempts to work out which circle was the target site and which was picking up the source. Moving the circles around was also an interesting experience but I gradually got the hang of it. In this instance the clone tool worked more efficiently than the spot healing tool. Once mastered I can see that it could be more area specific and adjustable than using Photoshop, although the Photoshop clone tool with an adjustment layer is very easy to apply and amend after. Finding I learn through experimentation as much as reading I wish I had checked the Adobe site first this time ;o)
Adobe Photoshop CS4 * Remove spots in Camera Raw
The final processed image is properly exposed with very little clipping in either highlights or shadows. The adjustments made to the white balance and colours has rendered a photograph very close to the actual scene. Local adjustments were easy to make (once I stopped arguing with the adjustment brushes) and made for subtle amendments.
 |
| Final RAW |
Artificial Light JPEG
On first inspection the colour cast is more pronounced in the jpeg and the shadows also appear much deeper.
 |
| Jpeg Original |
With Photoshop there are several options available to adjust the image. Using the clone tool I corrected minor problem areas. I found using the Photoshop clone tool much easier but this is probably due to familiarity.
 |
| Various layers applied |
Although I was able to recover some of the detail and colour and the final result is fairly accurate I am not as pleased with the jpeg as with the raw file.
 |
| Final JPEG |
 |
| Side by Side for comparison |
In conclusion I have found that whilst RAW conversion will take a little getting used to as the tools are not as familiar the results it gives makes it a worth while exercise. The level of control offered and subtley of the results you can achieve compared to the jpeg file is quite impressive especially when trying to correct colour balance and recover highlight/shadow clipping. If the levels of adjustment required is fairly low then a high resolution correctly exposed jpeg file will probably still return high quality results, I started this exercise being in favour of RAW conversion but was prepared to have an open mind as to the level of advantages offered, now I have completed it I am more convinced than ever that RAW is a fantastic tool to have in my photography tool kit.

No comments:
Post a Comment